Disclaimer

I created this blog so I would have somewhere to journal and share the things I make and do. I try not to steal other's ideas. Some of what I make I have seen in homes or in stores. Or I make a spin-off of something I have seen elsewhere. I will always try to give the proper credit where it is due.
~Mary
Showing posts with label kids. Show all posts

Saturday, September 24, 2011

2012 Primary Theme


Here's a little block I made~
I've already given this one away. But I really like it! I may make another one for my daughter's room.
This post has been link to the following~


I {heart}naptime

Monday, July 4, 2011

S'more Cups

I was on the Pampered Chef website the other day,
and came across a recipe for these little guys~

S'more cups!
Isn't it a cute little thing?
 And soooooo gooooood!
I took some to a family bar-b-que and everyone loved them! Kids, adults, everyone!

Here's the recipe from from their website.
I only did 2 things different.
Instead of using large marshmallows, I used the little star shaped ones you can buy during the summer time.
I also just spooned the melted chocolate on top instead of dipping the cups in the chocolate.


S'more Cups ~http://www.pamperedchef.com/

S'more Cups
The campfire is optional--these little treats can be enjoyed anywhere.
Ingredients:
7  whole graham crackers (1 cup/250 mL finely crushed)
1/4  cup (50 mL) powdered sugar
6  tbsp (90 mL) butter, melted
4  bars (1.55 oz or 43 g each) milk chocolate candy, divided
12  large marshmallows
Directions:
  1. Preheat oven to 350°F (180°C). Place graham crackers into a large resealable plastic bag. Finely crush into crumbs using Baker's Roller®;. Combine graham cracker crumbs, powdered sugar and butter in Small Batter Bowl. Using Small Scoop, place scant scoop of crumb mixture in each cup of Deluxe Mini-Muffin Pan. Press crumbs to form shallow cups with Mini-Tart Shaper. Bake 4-5 minutes or until edges are bubbling. Meanwhile, break two of the candy bars into rectangles. Remove pan from oven; place one rectangle into each cup.

  2. Cut marshmallows in half crosswise using Professional Shears dipped in cold water. Place one marshmallow half, cut-side down, into each cup. Return to oven 1-2 minutes or until marshmallows are just slightly softened. Remove from oven to Stackable Cooling Rack; cool 15 minutes. Carefully remove cups from pan. Cool completely.

  3. Break remaining candy bars and place in (1-cup/250 mL) Prep Bowl. Microwave on HIGH 1 minute-1 1/2 minutes or until melted and smooth, stirring every 20 seconds. Dip the top of each marshmallow in melted chocolate. Turn top-side up and let stand 40 minutes-1 hour or until set.

Yield: 24 cups
Nutrients per serving: (1 cup) Calories 100, Total Fat 6 g, Saturated Fat 3.5 g, Cholesterol 10 mg, Carbohydrate 11 g, Protein 1 g, Sodium 60 mg, Fiber 0 g
Cook's Tips: Dipping the Professional Shears in cold water before cutting the marshmallows helps minimize sticking.

The time it takes the chocolate to set varies depending on weather conditions and room temperature. You can refrigerate the cups briefly until the chocolate is set; store them at room temperature.

Store the cups in a single layer in an airtight container for up to 1 week. Freezing is not recommended.

For a richer chocolate flavor, substitute dark chocolate candy bars for the milk chocolate.

Saturday, May 21, 2011

Classroom Rules sign/Teacher Gift

My daughter graduated from Pre-School this month.
*sniff* Where has the time gone?
She has had such a fantastic teacher whom she loves!
So I wanted to give her teacher a nice gift at the end of the school year.
I know subway art is all the rage right now. And I have seen quite
 a few of these done up with 'Family Rules'.
Here's my version ~
'ClassRoom Rules'
It measures approximately 13x18 inches.

Wednesday, November 17, 2010

Turkey Cookies

Today it was my daughters turn to bring a snack and show-n-tell to pre-school. You will remember I made turkey cookies last year for her to take. They were okay, but not as cute as I thought they would be. So we tried a different type of turkey cookie this year...

Cute little booger, ain't he?

Wednesday, August 4, 2010

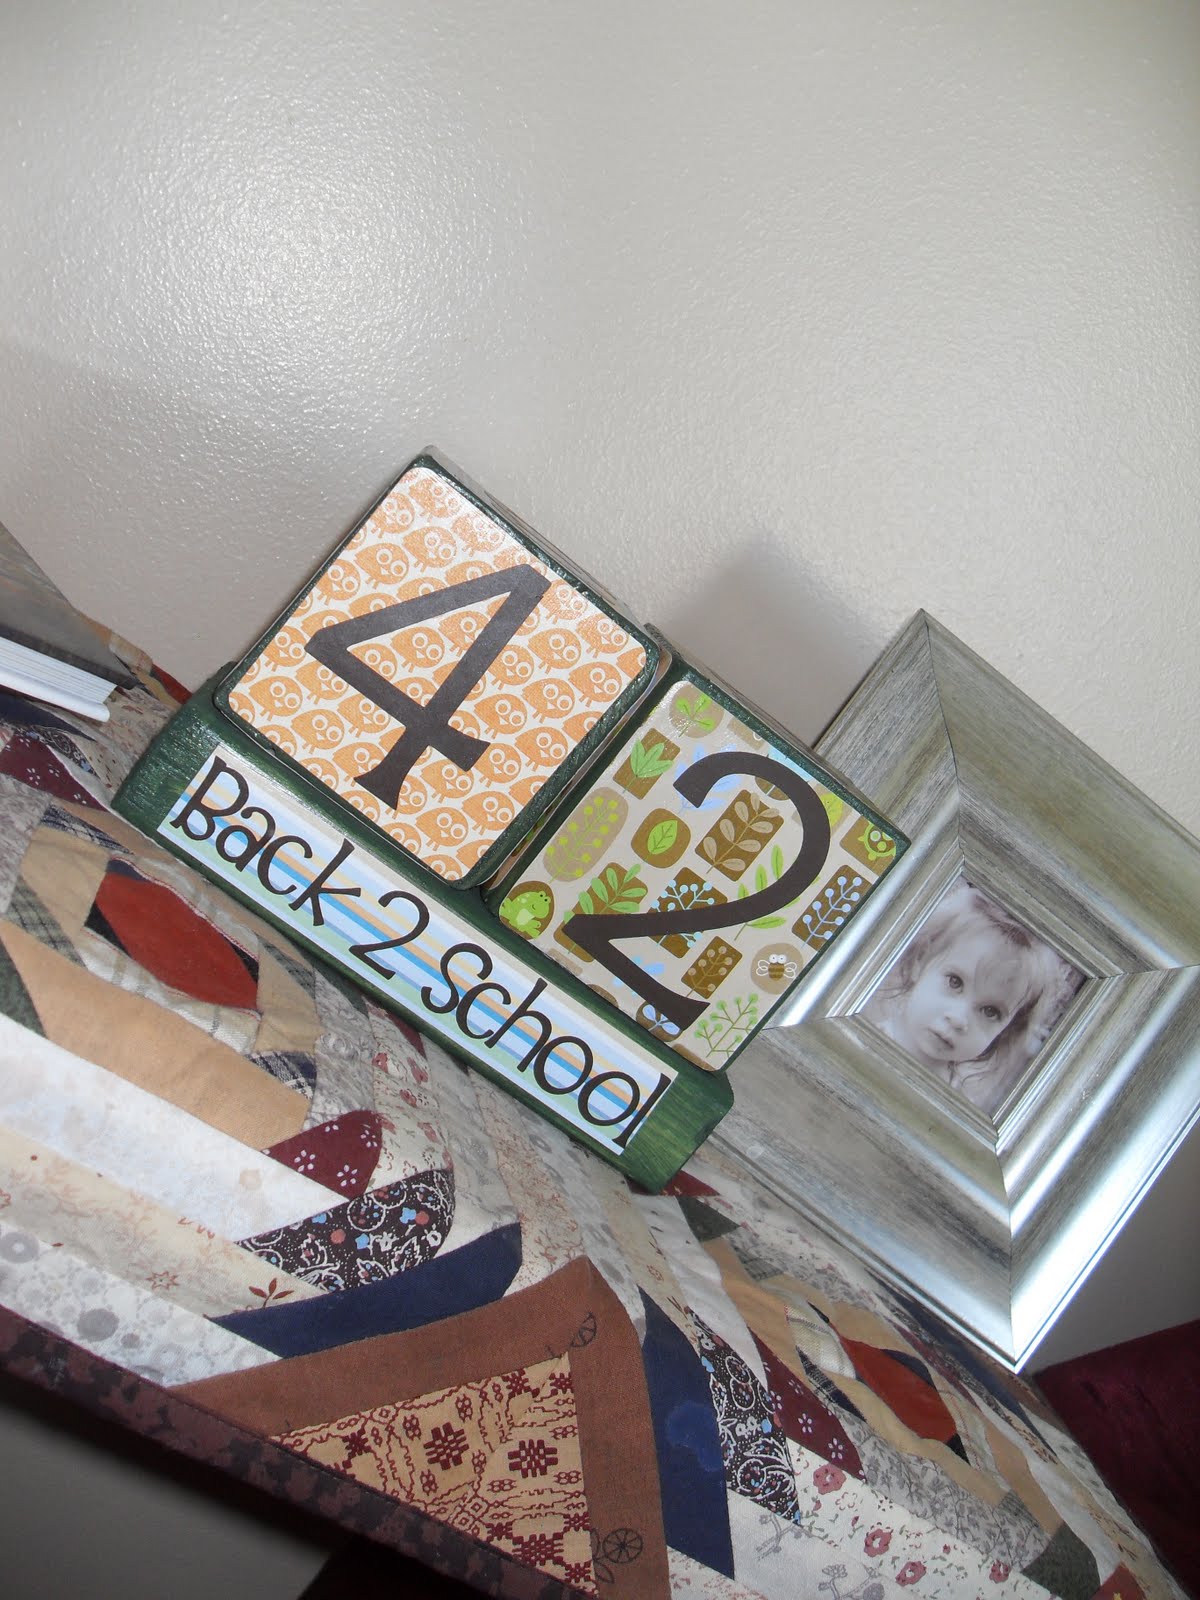
Countdown to School blocks!

My pre-schooler is so excited for school to start! So I made her a countdown block set to count down the days till school starts! She doesn't start until the second week in September, but we can start the countdown now!

I used three different colored scrapbook paper. I cut them to the size I needed then I mod podged them onto painted blocks,{ the base is a 2x4 that I cut to about 7 1/2 -8 inches} then I used Vinyl for the numbers and lettering . But stickers or die cuts would work as well. Just glue those on.
These are the numbers you'll need~0,0,1,1,2,2,3,4,5,6,7,&8{ make sure the 6 can double as a 9 if it's turned upside down}.
On the first block you use ~0,1,2,3,4,5. On the second block~6{doubles as 9},7,8,0,1,2.
I also have made these for Christmas here and Halloween here.
This has also been linked to a few show-n-tell sites here, here, and here.

Tuesday, June 22, 2010

Family reunion fundraiser items

I've been busy making a few items to donate to our Family reunion fundraiser. This is the first year we are doing a fundraiser, we'll see how it turns out! I think we will be raffling off items, with a few larger items being in a silent auction. All the proceeds will go to help fund future reunions!
So here's a few pictures of just a few items I've made and will donate for the fundraiser!
I'm putting together two packages that contain crochet headbands and hats for little girls/babies, that I bought at The Ribbon Retreat ,{SOOO afordable!} And I made the flower hair clips myself!~

Some Holiday Stackers. { I still need to make a summer one}~

A couple of small Pampered Chef gift sets I put together. { Did you know that Pampered Chef has an outlet store online? LOVE IT!!}~

Primary children's blocks~

I'll post some more pictures of more items later....

Wednesday, March 10, 2010

St. Patty's Day popcorn balls

So today was my little pre-schoolers turn to bring snakc and show-n-tell to school. Since next week is St. Patty's day she and I sat down at the computer to browse around and find a green snack! We found a recipe for colored popcorn here . We made them into popcorn balls. When I picked V. up from pre-school, she said her class loved them!

Give them a try!

Saturday, February 13, 2010

Krispy Treat Valentines!

Here is a cute Valentine's Day treat~
Make a batch up Kripsy Treats. Press the mixture into a cookie sheet/ bar pan. Butter your hands so the mixture doesn't stick to your hands. Then sprinkle some pink or red sprinkles on the top.

After they have cooled, take a heart shaped cookie cutter and press into the krispies in the pan.

Now you have some little Kripsy Treat hearts!

I wrapped them individually in cling wrap for each child.

Here's my goofy Valentine getting ready to take these to her friends and cousins!

Wednesday, December 2, 2009

2010 Primary birthday gifts

I was in charge of finding something to give the Primary kids on their birthdays next year. We wanted something that had the years theme on it. This is what I came up with....

I just painted some blocks and cut the lettering out with my cricut. The ones with the ribbon is of course for the girls. And the black ones will be for the boys. I think I figured the cost for everything will be around $20 total. We have only maybe 45 kids in our Primary. So very affordable, and something they can keep with the years theme on it.

Sunday, November 22, 2009

Thanksgiving Turkeys for Pre-Schoolers

This last week, my daughter had a turn to bring a snack to pre-school. At first, I thought about making Navajo Fry Bread, because they had been learning about the Indians and pilgrims. And my husband is half Navajo, so I have his mom's recipe for fry bread. But then I saw these cute turkeys on a blog somewhere, and I thought I had to make them! Aren't they cute! Okay, some look a little deranged, but it was my first time making something like this!
I made them using oreo cookies, candy corn, Reese's Peanut butter cups, Whoppers and of course, frosting to hold them all together!
I asked my husband if they looked okay. If he thought the kids would like them. He said," They're pre-schoolers, all they're gonna see is sugar." He's right! They aren't going to care what they look like. It's all yummy goodies!


Wednesday, November 4, 2009

Super Hero Cape

For my daughter's fourth birthday I wanted to get her a super hero cape, since she is always running around with a blanket or something tied around her neck. I was going to make it myself, but...sewing really brings out the worst in me. I, in no way, find it relaxing or enjoyable. Yes, I can sew. But I try to do as little as possible!
A friend of mine, Jill, loves to sew! She has her own business, http://jillscraftycovers.blogspot.com/ and she just started selling super hero capes. So I asked her if she would make a double-sided one for my daughter. I changed my mind about a dozen times with how I wanted it to look. But I finally made a decision and she had it made and in the mail before the week was over! And it turned out perfect!
On one side I asked her to do the CTR symbol.{CTR= Choose The Right}

Here's the other side, My daughters first initial~ Jill also makes hooded towels, nursing covers, and toy mats. Perfect gifts for Christmas, Birthdays, Baby showers, etc. And I think her prices are great! So go check her out at http://jillscraftycovers.blogspot.com/ and tell her Mary sent you!

Sunday, October 25, 2009

Flower Loop Bows

I made some more bows for my daughter's hair. They are called 'Flower Loop Bows' and were so fun and easy to make!
I LOVE this brown and blue one! I found directions for these at www.theribbonretreat.com. On their home page at the top it says 'free how to projects'. Click on that and it will take you to a page full of hair bow instructions. Have fun!


Sunday, October 18, 2009

Dinosaur Birthday Cake

We had my daughter's fourth birthday party yesterday. She said she wanted a green dinosaur cake. I found directions on how to make one at http://www.bettycrocker.com/recipes.aspx/rex-the-dinosaur--cake. It was much easier than I thought it would be. What do you think?


I cut the shape out of two 9" pans.{one cake mix}. The website shows you how to do that.
Then I made a homemade Buttercream frosting and tinted it green, then I frosted the cake. When ever you are frosting a cake, always do a thin layer of frosting first. This is called the crumb layer because it collects all the crumbs. Chill the cake for about 30 minutes, then frost it again. You won't have any crumbs showing because of the first layer you did.
Then I used white Buttercream frosting for the mouth and dots on the eyes.
For the eyes, toes, and small dots I used chocolate chips. I pushed them into the cake with the tips facing down. The bigger dots are Hershey Kisses that I did the same thing to. Pushed them in, tip side down. I also used Hershey Kisses as the spikes along the tail, back and up the head of the dinosaur.
My daughter loved it! And it was so fun to make!

Thursday, October 15, 2009

Birthday Monkey cupcakes

My daughters' birthday is this weekend. So she gets to bring cupcakes to pre-school today. This is what I made.
They are supposed to be monkey cupcakes. I made chocolate zuchinni cupcakes{ you can find the recipe for them in my 'recipe' section}, and then got the idea for the monkeys off of http://servingpinklemonade.blogspot.com/. But hers look much better. Go check them out!
My daughter loved helping me bake these, a.k.a. licking the cake batter bowl, and she was so excited to share them with her class. I guess when I go to pick her up we'll see how the kids liked them!


Wednesday, September 16, 2009

Ribbon Butterfly Clips

Aren't these little hair clips darling? I made them last night while watching reruns of Gilmore Girls{yet again}. They were much easier to make then I thought they would be. My husband was impressed when I showed him the finished product!


Now, I'm not going to do a tutorial on these, because I followed one over at www.theribbonretreat.com. Go there and at the top of the page is a tab titled~ Free How To Projects. Click on it. She has a few different how to's on different bows. Just click on the Little Bug Bows. And have fun!


Thursday, July 16, 2009

Hair bows

Aren't these bows cute? I saw something similar on a blog, forever-a-go. I don't remember where. I got a grab bag full of ribbon at The Ribbon Retreat{http://www.theribbonretreat.com/} in Shelly the other week, and started playing around with some of them and thought I would make these. I've never done these bows before. What do you think?

They are a lot cuter in person. After I put them in my daughters hair, I realized I should have made them a little smaller. I need to trim the edges in, I think. And never mind the yellow pony tail holders in her hair. She wanted to wear some Disney Princess ones.


Start off by putting a dot of hot glue on the end or your ribbon. Fold it over. Then glue the folded end underneath the barrette.


Run some glue across the top of the barrette.


Press your ribbon on.


Then you snip off the ribbon, not too close to the barrette. Add a dot of glue to the end and fold it over so it's glued that way.


Then glue the folded end under the barrette.


In this picture I'm trying to show how the ribbon is folded and glued underneath the barrette.


I made two of them. This is what they should look like after you have covered them with ribbon.


Then I just picked out the ribbon I wanted and tied a knot in the middle and hot glued them on. After you cut your ribbon, burn the edges just a little to prevent raveling. Darling,huh?


Tuesday, July 7, 2009

Flower clips tutorial

This is my first tutorial with pictures. Please bear with me as I try to get better at this!
These flower clips are everywhere! And so easy to make! I use any flower I find that I think will be cute in my daughters hair. I buy alligator clips because they grip the hair and don't fall out as easy. I also use french barrets. I buy them from http://www.theribbonretreat.com/. They are so cheap! A pack of 10 alligator clips are $2.00. And the french barrets were 20 for $1.50!


This one I made from a scrapbook flower.


One of my favs! Just a silk flower from Roberts.


You will need a hot glue gun, ribbon, scissors, any flower,{it can be silk or a scrapbook flower}, and your hair clip.


First,pull the blossom off of the vine and snip the end off so your flower will lay flat.


Then lift up each layer and put dabs of hot glue in between the layers.{ This is to make sure the flower dosen't fall apart}


Flip the barret over so the underside is facing up. Put a little dab of glue on the end and press the folded end of your ribbon on to it. {You want to fold the end of your ribbon under so you don't have an unfinished end showing}


The bottom should look like this.


Then put some glue across the top and press the ribbon on, tucking under the end.


So your clip should now look like so.


Again, another fuzzy photo. Sorry! I couldn't get it to focus for some reason! Put hot glue across the top of the barret and then place your flower on over that and press down firmly.


Voila! You now have your flower clip! I made a pair so my daughter can wear them with two pigtails.