Disclaimer

I created this blog so I would have somewhere to journal and share the things I make and do. I try not to steal other's ideas. Some of what I make I have seen in homes or in stores. Or I make a spin-off of something I have seen elsewhere. I will always try to give the proper credit where it is due.
~Mary

Saturday, September 24, 2011

2012 Primary Theme


Here's a little block I made~
I've already given this one away. But I really like it! I may make another one for my daughter's room.
This post has been link to the following~


I {heart}naptime

Monday, September 5, 2011

2012 Mutual Theme

Here is where they announced the 2012 Mutual Theme.
And here is what I did with that~
All I did was paint a board chocolate brown, then an ivory over that. I sanded it down so the brown shows thru in some areas. I added some vinyl lettering and finished it all with a clear coat finish.
Then I tied some tulle around the bottom.
I LOVE this scripture and I think it's a great theme for the Mutual, as well as anyone!
This post has been linked to the following~

Tatertots and Jello weekend wrap up party
I {heart} Nap Time
Photobucket

Monday, August 8, 2011

What to do with an old window frame

My neighbor gave me this old window frame a few years ago. I wasn't sure what to do with it. Most the glass was missing and the glass that was there was cracked. So I punched out all the glass, and sanded the the whole thing down. Then I painted it black and distressed it by doing some more sanding.
I wanted to hang it up in the house somewhere, but couldn't make up my mind as to where.
I finally just thought I would see how it would look outside, somewhere.
I put it in my front flower bed.
I'm not sure if I want to maybe plant something that would crawl up it, or just leave it the way it is.
But I do like it in the flower bed!

This post has been linked to the following~

Be Different, Act Normal
I {heart} Naptime
Tatertots and Jello
Photobucket

Monday, July 4, 2011

S'more Cups

I was on the Pampered Chef website the other day,
and came across a recipe for these little guys~

S'more cups!
Isn't it a cute little thing?
 And soooooo gooooood!
I took some to a family bar-b-que and everyone loved them! Kids, adults, everyone!

Here's the recipe from from their website.
I only did 2 things different.
Instead of using large marshmallows, I used the little star shaped ones you can buy during the summer time.
I also just spooned the melted chocolate on top instead of dipping the cups in the chocolate.


S'more Cups ~http://www.pamperedchef.com/

S'more Cups
The campfire is optional--these little treats can be enjoyed anywhere.
Ingredients:
7  whole graham crackers (1 cup/250 mL finely crushed)
1/4  cup (50 mL) powdered sugar
6  tbsp (90 mL) butter, melted
4  bars (1.55 oz or 43 g each) milk chocolate candy, divided
12  large marshmallows
Directions:
  1. Preheat oven to 350°F (180°C). Place graham crackers into a large resealable plastic bag. Finely crush into crumbs using Baker's Roller®;. Combine graham cracker crumbs, powdered sugar and butter in Small Batter Bowl. Using Small Scoop, place scant scoop of crumb mixture in each cup of Deluxe Mini-Muffin Pan. Press crumbs to form shallow cups with Mini-Tart Shaper. Bake 4-5 minutes or until edges are bubbling. Meanwhile, break two of the candy bars into rectangles. Remove pan from oven; place one rectangle into each cup.

  2. Cut marshmallows in half crosswise using Professional Shears dipped in cold water. Place one marshmallow half, cut-side down, into each cup. Return to oven 1-2 minutes or until marshmallows are just slightly softened. Remove from oven to Stackable Cooling Rack; cool 15 minutes. Carefully remove cups from pan. Cool completely.

  3. Break remaining candy bars and place in (1-cup/250 mL) Prep Bowl. Microwave on HIGH 1 minute-1 1/2 minutes or until melted and smooth, stirring every 20 seconds. Dip the top of each marshmallow in melted chocolate. Turn top-side up and let stand 40 minutes-1 hour or until set.

Yield: 24 cups
Nutrients per serving: (1 cup) Calories 100, Total Fat 6 g, Saturated Fat 3.5 g, Cholesterol 10 mg, Carbohydrate 11 g, Protein 1 g, Sodium 60 mg, Fiber 0 g
Cook's Tips: Dipping the Professional Shears in cold water before cutting the marshmallows helps minimize sticking.

The time it takes the chocolate to set varies depending on weather conditions and room temperature. You can refrigerate the cups briefly until the chocolate is set; store them at room temperature.

Store the cups in a single layer in an airtight container for up to 1 week. Freezing is not recommended.

For a richer chocolate flavor, substitute dark chocolate candy bars for the milk chocolate.

Saturday, July 2, 2011

4th of July Painted Window

I saw this tutorial a couple of years ago and have wanted to give it a try.
But I was too chicken.
Don't ask me why, but some crafts just really intimidate me!
Anyway, the other night I was up watching Masterpiece Mystery { which is one of my fav shows to watch!}
and I decided to pull an old window I had out of my garage and finally get this window painting done!
Here's the end result~
What do you think? I'm pretty proud of myself for doing this. And if I can do this, anyone can! So go here to see how to do this yourself!
Happy Independence weekend everyone!

Saturday, May 21, 2011

Classroom Rules sign/Teacher Gift

My daughter graduated from Pre-School this month.
*sniff* Where has the time gone?
She has had such a fantastic teacher whom she loves!
So I wanted to give her teacher a nice gift at the end of the school year.
I know subway art is all the rage right now. And I have seen quite
 a few of these done up with 'Family Rules'.
Here's my version ~
'ClassRoom Rules'
It measures approximately 13x18 inches.

Saturday, April 23, 2011

Welcome to our front door!

After wanting to do this for 2 years, I finally did it!
I added some vinyl lettering to our front door.
We don't have the fanciest door and screen, but the lettering still looks great on it!

Monday, February 28, 2011

Peanut Butter Blossoms

mmmm....Chocolate and Peanut Butter....sooo good!
1 pkg, Hershey's Kisses

sift together:
3 1/2 cups flour                1 tsp. salt
2 tsp. baking soda

cream together:
1 cup butter                     1 cup peanut butter
gradually add:
1 cup sugar                      1 cup brown sugar
Cream well.
add:
2 eggs                             2 tsp. vanilla

Beat well. Gradually add the dry ingredients and mix thoroughly. Shape dough into ball using a rounded teaspoon for each. These are smaller than I normally make my other cookies. But you don't want these too big! Roll balls in a bowl of white sugar and place on baking sheet. Bake at 375* for 10 minutes. remove from oven. Press a chocolate candy kiss in the center of each cookie.
Return to oven for about 2 minutes{ Don't allow candy to melt to much!}.

Wednesday, November 17, 2010

Turkey Cookies

Today it was my daughters turn to bring a snack and show-n-tell to pre-school. You will remember I made turkey cookies last year for her to take. They were okay, but not as cute as I thought they would be. So we tried a different type of turkey cookie this year...

Cute little booger, ain't he?

Monday, November 8, 2010

Thanksgiving Decor

This isn't a typical Thanksgiving quote, but I love it! I found the charger at Wal-Mart last month for $3. They might be cheaper now that they are starting to clearance the fall stuff to make room for Christmas stuff. But $3 is still a great deal! The white vinyl doesn't quite go, I think a cream or off-white would have been better. But I don't have those colors, so I just used what I did have!

Monday, October 11, 2010

VInyl~ Not JUST for decorating Part 2

Okay, not the best picture, it's kinda fuzzy. And I don't have the prettiest feet either. You remember I showed you here how I used vinyl to cut out decals for bikes?
Now I want to show you how you can look like you spend money on making your toes pretty, when in reality, it's sooooo cheap!
I cut shapes out of vinyl and then put them on my toes! SO cute, huh?

After I put the vinyl on, I add a layer of clear nail polish, to seal it. It looks like I go to the salon weekly to have my toes made up, but I don't! I just do it at home!
Yesterday I cut some bats out of black vinyl. I think I'll go buy some orange nail polish and make my toes a little more Halloweenish!

Outdoor Fall Decorating.

Okay, I am not the best nor the most creative decorator. But I tried my hand at turning the outside of my home into looking a little more fall/Halloween looking.
My flowers pots I have on either side of my garage have died. I thought about planting some fall mums in them, then decided to just fill them with pumpkins and squash. I stuffed some fallen leaves in between the pumpkins and such as well.{that bush in the background will turn a fiery red soon. I LOVE it!}

I have a bench next to my porch that I put a couple of pumpkins and squash on. I think we might stuff some of hubbie's old clothes and make a scarecrow to sit on the bench as well.

I took branches left over from when we trimmed our apples trees in the spring and sprayed painted them black. Then my pre-schooler and I put some spider webs on them and a couple of spiders.{we need to buy more of those spiders, I don't know where they all go!} We then stuffed the branches into our flower pots and added more pumpkins and squash!

I tied some Halloween ribbon I got from Wal-Mart last year when it went on clearance around my lights.

I moved my wood pumpkins I showed you here, onto my porch.{I still think I want to make a third one}.

And here's a picture of my porch. Not the best looking, but I feel like every year I get a little better! And I don't think I'm quite done with the porch yet, maybe add some corn stalks, and such.

Wednesday, October 6, 2010

VInyl~ Not JUST for crafts!

Before I show you how else you can use vinyl, let me tell you about a great place to buy your vinyl for WAAAAY cheap. SignWareHouse.com . I can get a roll of vinyl, which measure 24" x 10 yds for about $30*{that's including shipping!}. Now, my cricut is only 12" wide. So I use my father-in-laws chopsaw to cut the roll in half. It does it so neatly! Now I have TWO rolls of vinyl that are 12" x 10 yds. FANTASTIC! It is seriously sooo cheap! I have a friend who also has a Cricut and we buy a roll together, cut it in half so it fits our machines and we each get half a roll and pay only $15 each! Great!
*{The price can vary. But it is still so affordable! And no, SignWareHouse did not ask me to write a review on their products. I just wanted to share with you the place of where I get my vinyl from!}
Alright, do you still not have a Cricut, vinyl cutter, silhouette, etc? Can't seem to convince your hubbie to buy you one? Show him this post and he might change his mind!
Hubbies brother was in town a few months ago. I was making some crafts for my family reunion fundraiser. I was making a tile with vinyl on it. Brother-in-law became interested in the stuff. "What else can you put that stuff on?", he asked.
"Absolutely anything!!",was my answer.
That got him thinking.
So, a couple of weeks ago he's back in town. With his dirt bike.
"Can you cut me something to go on my bike?",he asks.
"Of course!", is my answer.
So I sat down at the computer with him and we browsed this site. A totally awesome site where you can download THOUSANDS or FAH~REE fonts, dingbats, anything!
We found a logo on there and decided to give it a try~

We added that Suzuki 'S' to the front fender.
Brother-in-law and hubbie were now excited and wanted to do more!
So we downloaded the Suzuki font and added it to....I think they called this the 'swing arm'? {I don't know much about bikes}.
Here's the before picture~

And the after picture~

And here's the bike after we finished with it~

So, yeah ladies, tell your hubbies that getting a vinyl cutter will not only benefit you or your home decor, but HE can benefit from it's uses as well!
Christmas is just around the corner. I'm just sayin'. A vinyl cutter would make a nice Christmas gift if he needs ideas...

*****UPDATE*****
I DO NOT make any money from this blog. Even though I was able to download the Suzuki font for free, I am assumning that they would prefer it be used for only personal purposes. And not used to make money of any kind from it!

Monday, October 4, 2010

2x6 wood pumpkins


I made these with some scrap 2x6's we had laying around. I had two different heights of wood. I sanded them down, then painted them a bright orange. I then sponged a darker orange over the top of that. The 'stems' were spare blocks of wood cut from a 2x2. I painted them a green then sponged a darker green over the top.
I just nailed the stems to the top of the pumpkins. But wood glue would work just as well!
I used some scrape pieces of fabric to tie around the stems.
I then painted some wooden hearts I had and glued them onto the pumpkins and added a little raffia to the hearts.
I think I might go buy another 2x6 to make a third pumpkin....

Cake Mix Cookies

These are some of the yummiest and easiest cookies to make!

I have a friend who calls them the BEST Chocolate Chip Coookies ever! Make them and decide for yourself!
What's great about this recipe is there are countless different cookies you can make. Play around with different combinations until you find your favorite! My hubbies favorite is Yellow cake mix with semi-sweet chips, or Chocolate Fudge cake mix with white baking chips.My favorite combo is a Chocolate cake mix with either Caramel baking pieces or Peanut Butter baking pieces! This also makes a very easy 'Cookies in a Jar' mix. Just layer the dry ingredients in a glass jar and attach the directions to complete them and, there you go!

~Cake Mix Cookies~

1 cake mix {any kind}Just the cake mix!
1/2 cup oats
1/2 cup coconut{I leave this out because I'm not a coconut fan!}
1/2 cup melted butter
2 eggs
1 cup chocolate chips

Stir together {if you've added coconut this can be a dry mixture, mix with a fork}.
Bake at 350* for about 9-11 minutes, depends on how fast your oven bakes them.Be careful not to over bake. You want them to firm up a little when pressed in the center, but they will still look and feel a little underdone. I'm not sure how to explain it to you. I just know when they are done by the look and feel of them. Just trial and error I guess!
Play around with different cake mixes and baking chips and make the recipe your own!!

Saturday, September 11, 2010

Zuchinni Soup

I'm sharing this absolutely delicious recipe with you that I got from my sister-in-law. We still have zuke coming out of our garden, and the weather has been cooler. So I've been in the mood to make soup!
This recipe is great if you have picky eaters because it is all puree'd up. No chunks of anything in it! Your kids{and hubbie} won't even know there is Zucchini in it! You've got to try it out!

Zucchini Soup

1 1/2 pounds zucchini, unpeeled and sliced thin{or shredded} chopped
1 medium onion chopped
1/4 cup Butter
1/4 tsp. Nutmeg
1/8 tsp. Pepper*
1/2 tsp. Salt*
1 can Cream of Chicken soup
1 can Chicken Broth
1/2 cup Light Cream or Evaporated Milk

Saute onion and zucchini in butter until limp. Add chicken broth and simmer covered, for 15 minutes. Puree in blender and add cream of chicken soup, nutmeg,salt, pepper and cream. Blend. Heat and serve!
*I add more because I like more seasoning. Just add what tastes good to you!

Wednesday, August 4, 2010

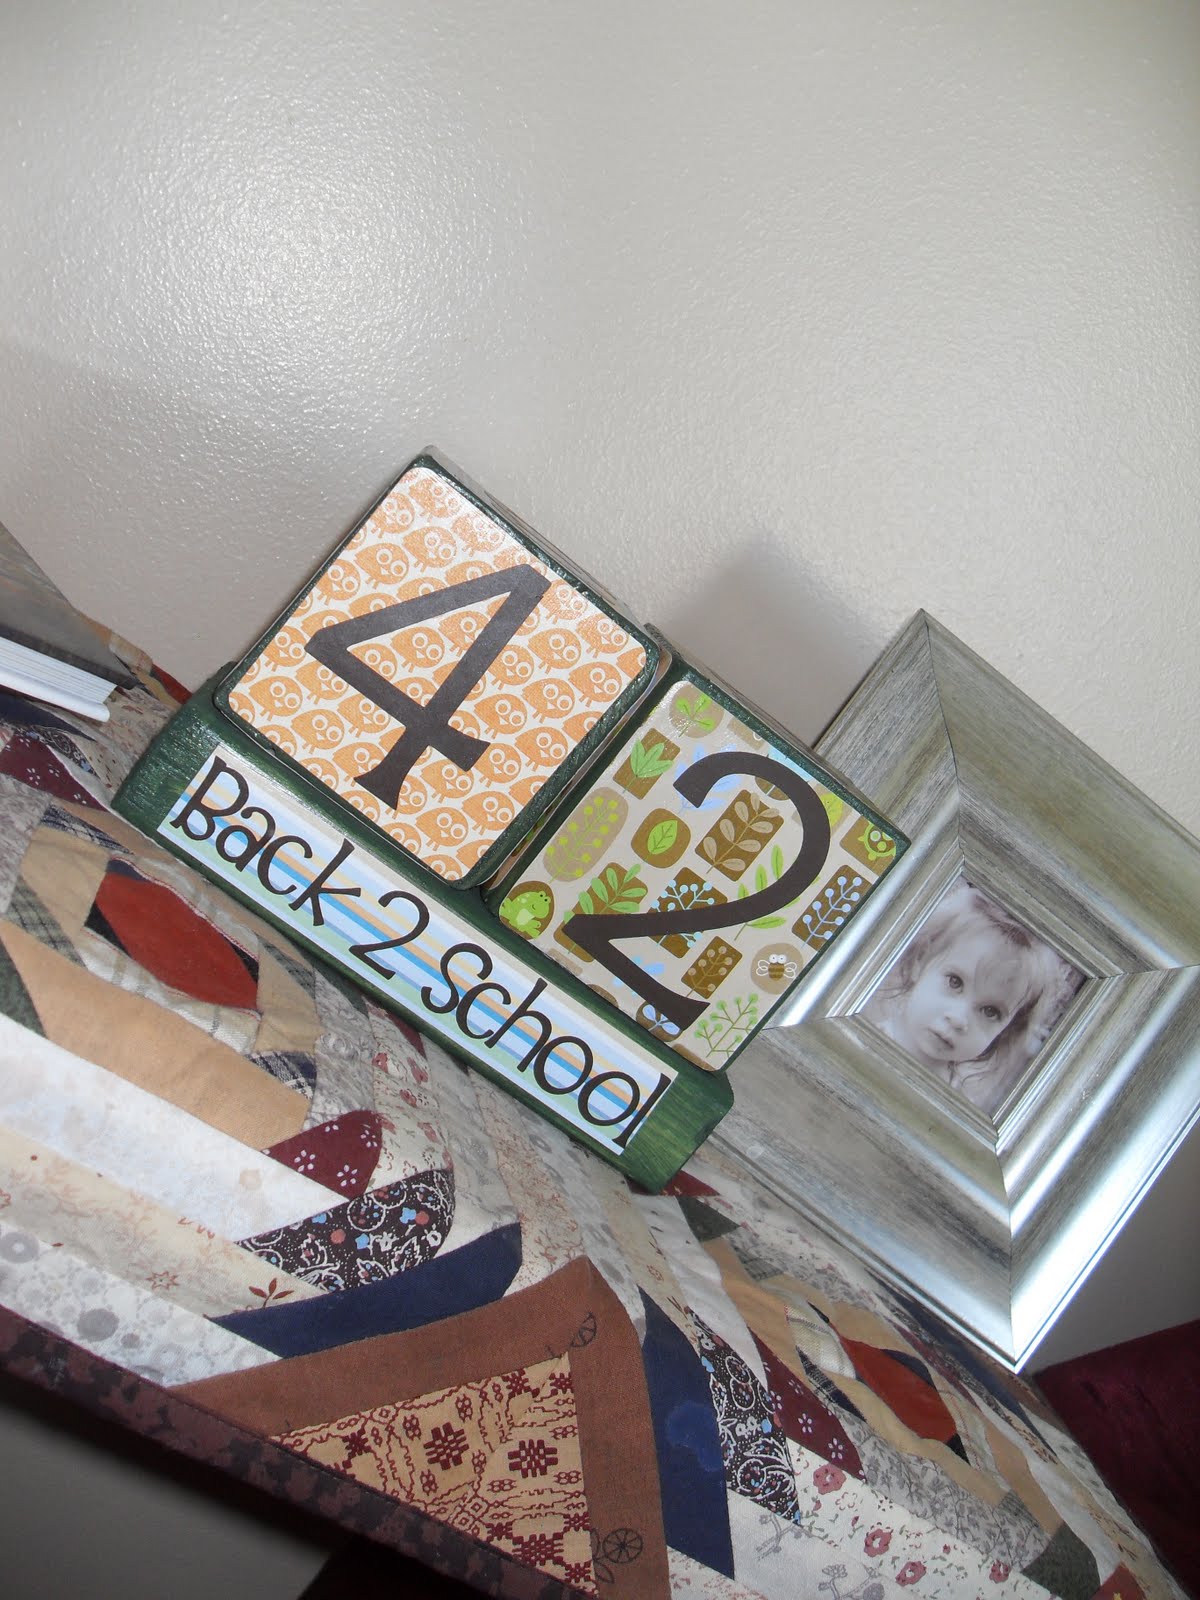
Countdown to School blocks!

My pre-schooler is so excited for school to start! So I made her a countdown block set to count down the days till school starts! She doesn't start until the second week in September, but we can start the countdown now!

I used three different colored scrapbook paper. I cut them to the size I needed then I mod podged them onto painted blocks,{ the base is a 2x4 that I cut to about 7 1/2 -8 inches} then I used Vinyl for the numbers and lettering . But stickers or die cuts would work as well. Just glue those on.
These are the numbers you'll need~0,0,1,1,2,2,3,4,5,6,7,&8{ make sure the 6 can double as a 9 if it's turned upside down}.
On the first block you use ~0,1,2,3,4,5. On the second block~6{doubles as 9},7,8,0,1,2.
I also have made these for Christmas here and Halloween here.
This has also been linked to a few show-n-tell sites here, here, and here.

Thursday, June 24, 2010

More Family reunion fundraiser items!

Alright, here are some more photos of some items I've made and am donating to our family reunion fundraiser~
Lead me, Guide me stackers~

A set of photo blocks with pictures of my grandma and grandpa. Some when they were young, some when they were older~

Holiday countdown blocks~

I added some vinyl lettering to the bucket so it says ' Bucket of Spuds'. We are coming from Idaho, so I thought it would be fun. These Spud candy bars are the best, if you haven't had one, you need to find one!~

Some 12 in. tiles~
{ I got the idea for the one with names on it from here. She sells the kits for these, only I think they are for a different size block of wood, not a 12 in. tile. I just changed it up to fit what I had.}

One of my Grandma's favorite quotes form her favorite author~
{only looking at it now, I realize I added a 't' on nearest that shouldn't be there. Looks like I need to fix that before we leave!}

Be blocks~ I got the idea for these from here. She sells the kits for these,{at least I think she still does}~


This next block has my Grandpa's motto on it. It reads " Anything worth doing, is worth Overdoing."

I thought this would be great for our family~

Tuesday, June 22, 2010

Family reunion fundraiser items

I've been busy making a few items to donate to our Family reunion fundraiser. This is the first year we are doing a fundraiser, we'll see how it turns out! I think we will be raffling off items, with a few larger items being in a silent auction. All the proceeds will go to help fund future reunions!
So here's a few pictures of just a few items I've made and will donate for the fundraiser!
I'm putting together two packages that contain crochet headbands and hats for little girls/babies, that I bought at The Ribbon Retreat ,{SOOO afordable!} And I made the flower hair clips myself!~

Some Holiday Stackers. { I still need to make a summer one}~

A couple of small Pampered Chef gift sets I put together. { Did you know that Pampered Chef has an outlet store online? LOVE IT!!}~

Primary children's blocks~

I'll post some more pictures of more items later....

Little Pink Chicken {Sweet and Sour Chicken}

I've never been a fan of sweet and sour chicken. Until I found a yummy recipe for it! I found the recipe here. She found the recipe in the "The WorldWide Ward" cookbook. {She also gives the story behind why it's called Little pink chicken} You really should give it a try! This is now a family favorite at our house!

Little Pink Chicken {Sweet and Sour Chicken}

2 large chicken breasts
1/2 tsp garlic salt
cornstarch
1 egg beaten w/ 1 T water
1 cup sugar
1/3 cup vinegar
1/3 cup ketchup
1/4 cup chicken broth
1 tsp salt
2 T soy sauce

Cut chicken in pieces and sprinkle with garlic salt. Let sit 1 hr. Dip in cornstarch, then in beaten egg. Fry in hot oil until brown. Place in casserole dish. Combine sugar, vinegar, ketchup, chicken broth, salt and soy sauce. Microwave for 5 minutes, stirring mixture halfway thru. Pour over chicken and bake uncovered at 350 degrees for 30-45 minutes, until the sauce is thickened. Makes 6-8 servings.
I also made some fried rice to serve with this. Tasty!