Disclaimer
~Mary
Monday, August 31, 2009
Fall blocks
I had my hubby cut a 2x6 piece of wood into 8 inch blocks. AND he sanded the wood for me without me having to ask him! {I'm so lucky to have a husband like him!}
I sponge painted the wood a 'Bittersweet Chocolate' color that I got from Glidden Paint for free! I sanded the edges a little { the more you get to know me, you'll notice I almost always distress things }. Then I cut out some scrapbook paper to the size I wanted and mod podged it on. Then I added my vinyl letters and some ribbon.
Here's a little bit closer up shot of the blocks. I think it turned out pretty nice!
Thursday, August 27, 2009
Autumn Stacker
Isn't this a cute fall stacker? It was soooo easy to make!
I had my hubby cut a 2x2{which is really about 1 1/2 x 1 1/2}. I sanded the blocks down.
Oh! the bottom block measures 10 1/2 inches.
Anyway, then I painted the bottom and top blocks a 'Terra cotta', and the middle block a 'Barn Red'. I sanded the edges jeeeest a little bit. Then I added my vinyl words. Easy, peasy! Less then half an hour, the only thing that takes time is waiting for the paint to dry.
Tuesday, August 25, 2009
'Harvest' Block
I couldn't remember what this block of wood was SUPPOSED to be. But right now it measures 1 1/2 x 2 1/2. And I cut it to a length of 8 in.
I didn't take step-by-step photos, because whenever I do they just seem to be all fuzzy...
Anyway, I sanded this block down and painted it an 'Autumn Brown'. Then I Mod Podged on some scrapbook paper. I cut the big H out of black vinyl, and the word HARVEST out of brown vinyl. I applied the big H first. Then HARVEST over that. I cut the leaves out of a piece of scrapbook paper that had leaves on it. And I Mod Podged those on as well. Then I just covered the whole front of the block with a thin layer of Mod Podge.
Turned out pretty cute, huh? I also made one for Thanksgiving I'll show you when we get closer to that time...
Wednesday, August 19, 2009
Zuchinni Chocolate Cake/Bread
Anyway, my friend Jamie asked for the recipe and when I gave it to her she said she uses the exact same recipe to make bread. The only thing different was the chocolate that you use. So I tried the bread, and it was just as yummy!
Here's the original recipe~
Zucchini Chocolate Cake
1 cup vegetable oil
2 cups sugar
3 eggs
2 1/2 cups flour
1/2 teaspoon salt
1 teaspoon baking soda
1/4 teaspoon baking powder
1/2 cup milk
*3 {1-ounce} squares unsweetened baking chocolate
1 tablespoon vanilla
2 cups grated Zucchini
In a large bowl combine oil, sugar, and eggs. In a separate bowl sift dry ingredients; add to first mixture. Add milk and mix well. Melt baking chocolate in the microwave for 20-second intervals, until just melted. Blend chocolate and vanilla into batter. Stir in Zucchini. Bake in a greased 9x13 baking dish at 350 for about 25 minutes. Cool and frost with either a homemade or store bought chocolate frosting.
* If making bread, use 1/2 cup cocoa instead. Add chocolate chips if you like! This makes two loafs. It took a little longer to bake all the way thru, just bake until a toothpick inserted in the middle comes out clean.
Thursday, August 13, 2009
'Life is Good' block
I was getting my hair done the other day and I noticed on the shelf above the sinks where the girls wash your hair there was this cute little block with a pleasant thought on it. I thought," I could make that!" So I did!
I took a scrap piece of wood and sanded it down. I painted it a black, then sanded the edges for that distressed look. I used my cricut to cut the words out of vinyl. I have this on top of my fridge. I just love the simplicity of it!
Tuesday, August 11, 2009
Vinyl wall hanging
Sunday, August 2, 2009
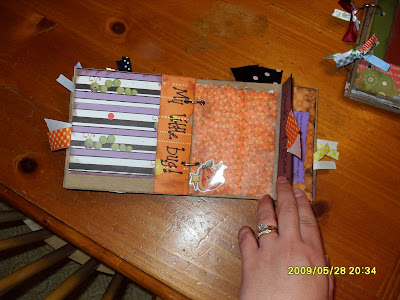
Brown Paper Bag Halloween Memory Book
This is the front. {I'm not the fanciest scrapbooker}.
You open it up and you see the cutest little girl ever! {Please excuse my thumb in the picture. I'm covering V.'s name to protect her online identity}
The side of the book here is the bottom of the bag. I can fold them two different ways. The way it's folded here I have a flap I can lift up to see a {future} picture underneath.